
Recording a new harvest
From the pin on the map to a saved harvest with a seal, a photo and the veterinary report — five steps on the phone.
A harvest is recorded where it happened: you place the pin on the map, choose the species and the state of the animal, attach a seal, fill in what the ground and the law need, and add photos. The laboratory examination report can be attached as a PDF, so the whole entry — including the vet's paperwork — lives in one place. It works offline too; the entry syncs into the ground once you are back on signal.
Place the pin where the animal lies
Open the ground map and put the pin on the spot. The bar at the bottom offers adding a point — a harvest is recorded the same way as any other point of interest.
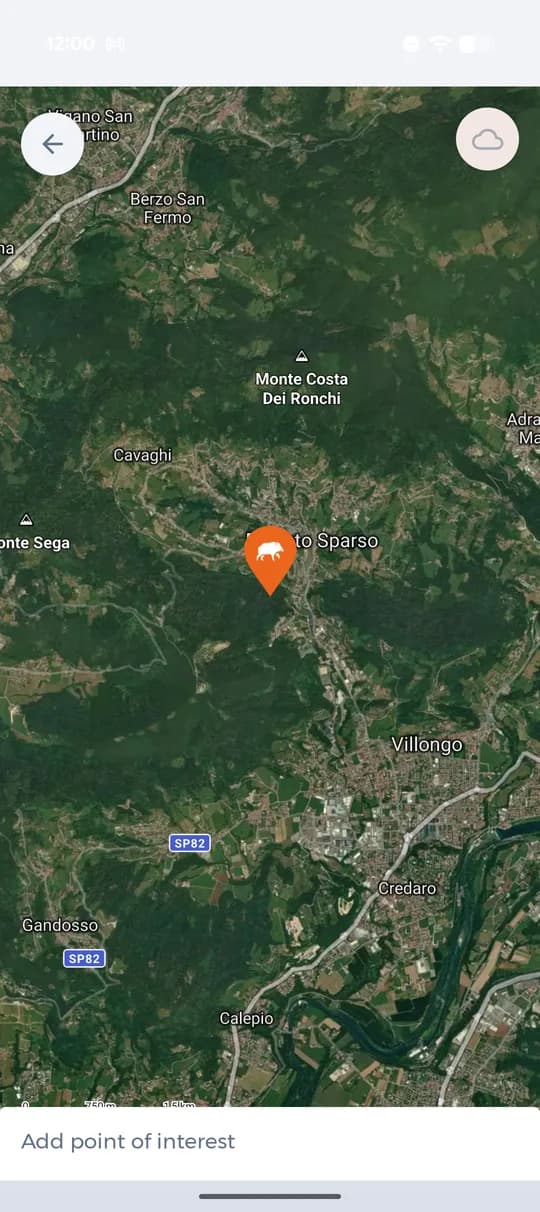
The pin on the ground map. Species, state, seal and hunter
Choose the group (bovidae, deer, suidae and others) and the exact species, then the state of the animal — downed, found, mauled and so on. Here you also pick the seal, the sex, the hunter and the time of kill.
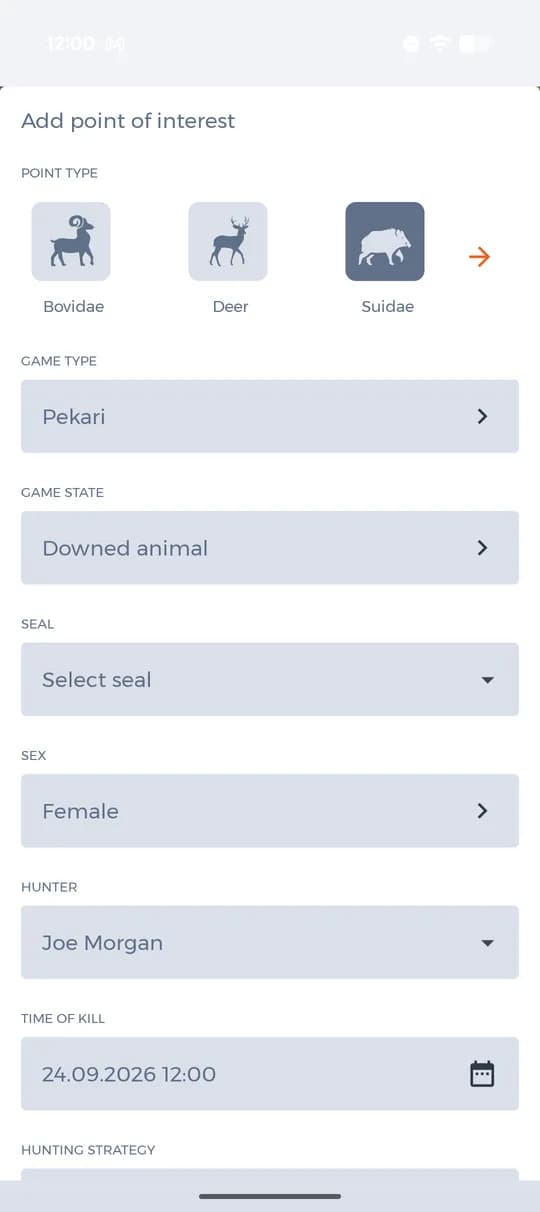
The beginning of the harvest form. Age, score and what happened with the game
Fill in the age class or tick that it was a juvenile, add the score, the weight, the usage and the delivery place. Only the fields your ground actually needs have to be filled.
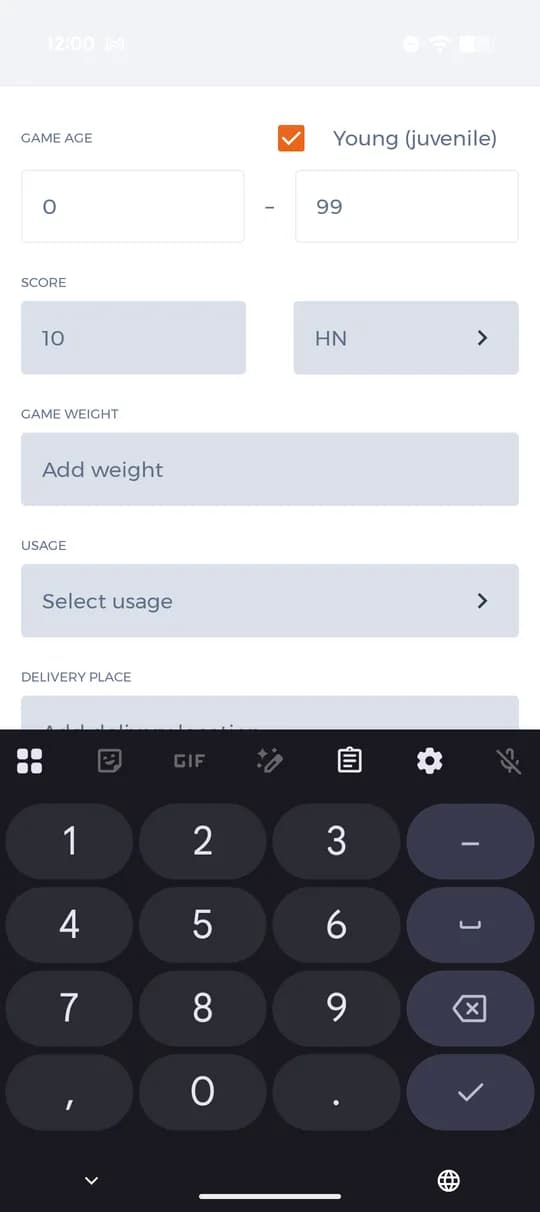
Age, score, weight and usage. Add photos
A photo is taken straight from the camera or picked from the gallery. It stays with the harvest, so it is clear later what the animal looked like and in what condition it was.
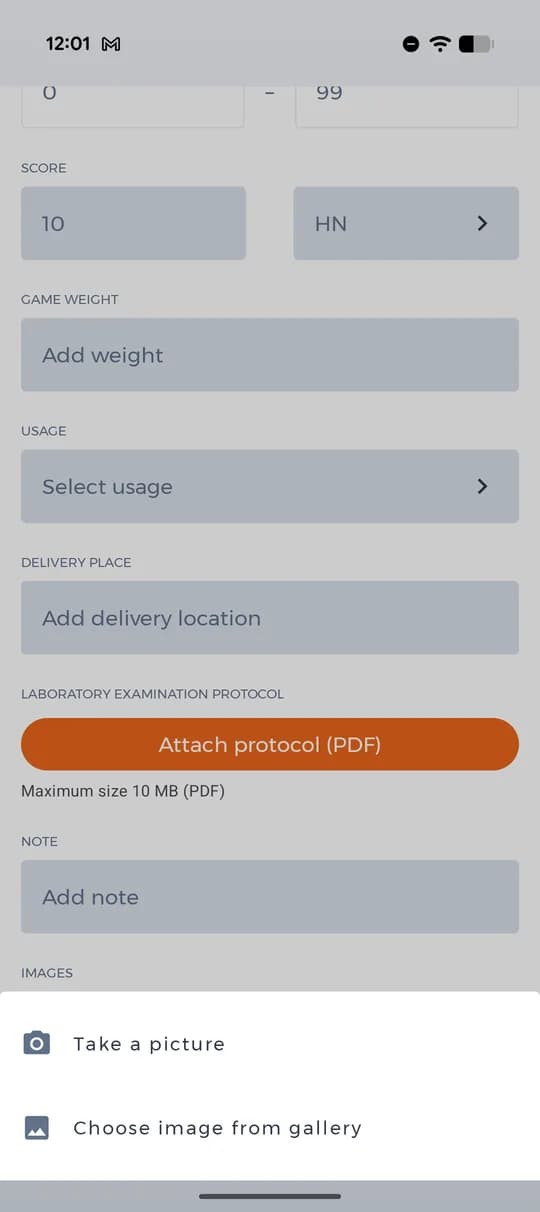
Taking a photo or choosing one from the gallery. Attach the veterinary report and save
The laboratory examination report — the paperwork from the vet — is attached to the harvest as a PDF up to 10 MB. Then you save, and the harvest is in the ground records with everything that belongs to it.
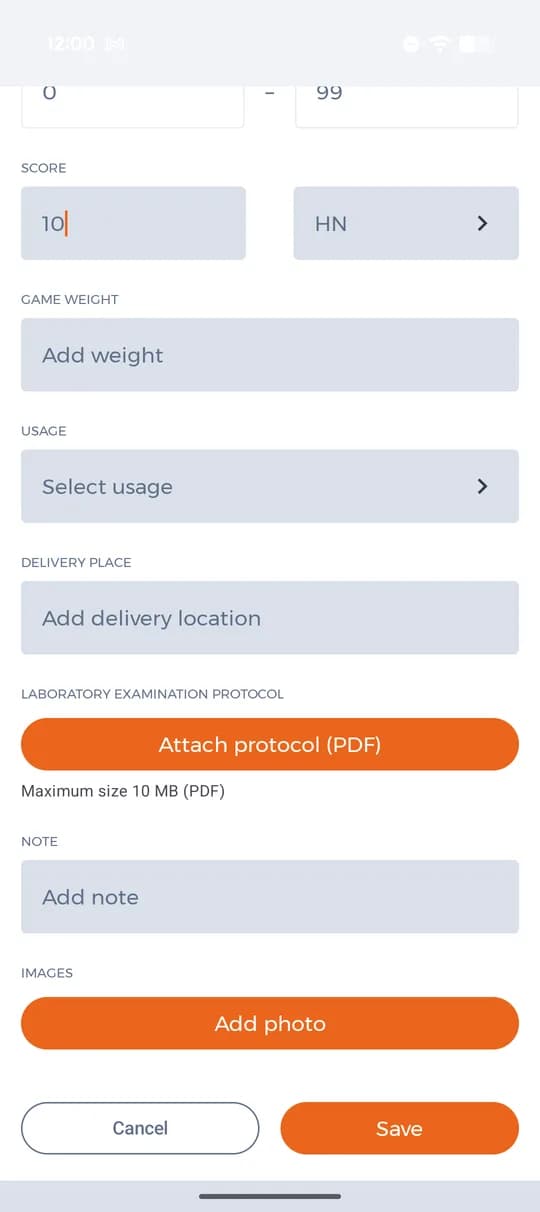
Attaching the examination report as a PDF.
Recorded without a signal too: the entry is stored on the phone and syncs into the ground once you are back online.
